Companion Information to Esha’s Refined Rigging
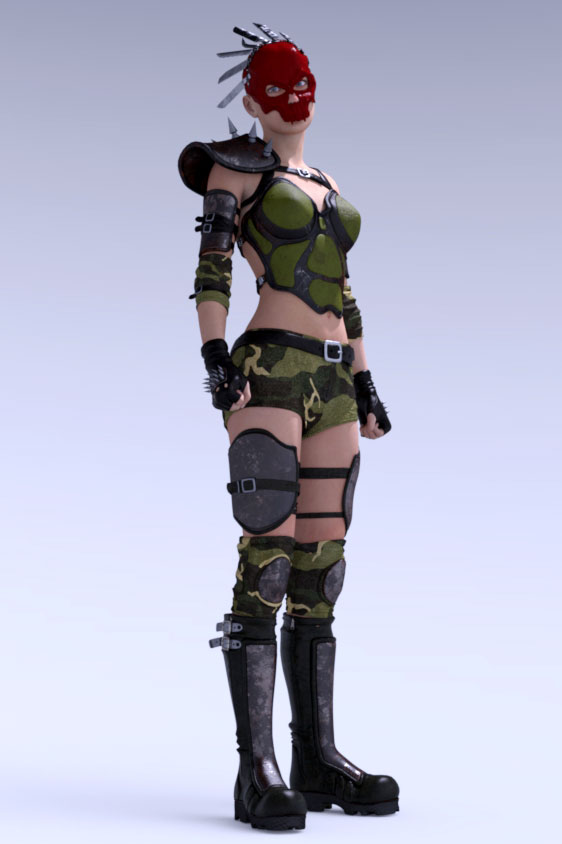
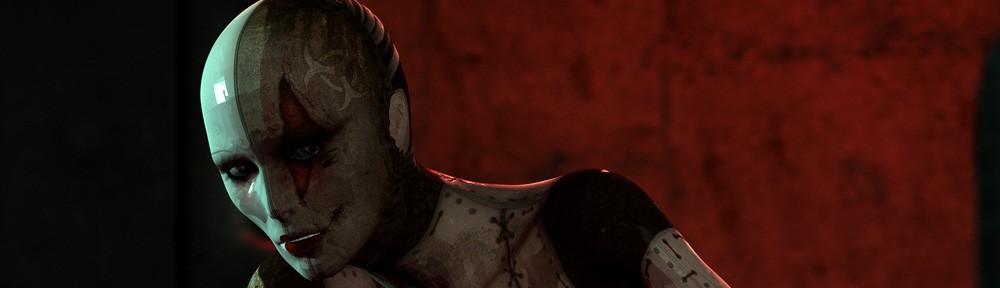
Kallisto Mutant Warrior painstakingly morphed and re-rigged to Genesis 2 F. Though Genesis 3 F is used in this tutorial.
This tutorial is a follow up to the review I did of Esha’s Refined Rigging. Though I found the tutorial very helpful, I did find some shortcomings. I have also picked up a few things I thought would be beneficial for other users starting out with creating morphs, such as Joint Control Morphs, to enhance their content, or customise existing DAZ content.
This is not an exhaustive tutorial, though I do go into some detail on the elements that weren’t explored by Esha.
When Esha’s Refined Rigging crossed my path I was working on painstakingly refitting, and rigging ElorOnceDark’s Kallisto Mutant Warrior (Victoria 3) for Genesis 2 Female. As far as I’m concerned, ElorOnceDark’s products are some of the most unique and interesting available in DAZ’s store. Unfortunately, most are for older figures such as V3, A3, and V4, thought there are a couple of very cool more recent products too.
When I started on the project, the generation 3 expansion for Wear Them All hadn’t yet been released, and regardless, I wanted a more complete conversion than auto-fitting generally provides. I knew at some point I would have to get into creating JCMs (joint controlled morphs) to fix up deformation issues, but this was something I knew nothing about and was quite intimidated by. Esha’s Refined Rigging gave me the confidence I needed to get going.
The Difference between Victoria 6 and 7
One thing I noticed about the difference between Victoria 6 and 7, was that V7 makes far greater use of JCMs than V6. If you are an experienced content creator this probably seems obvious, but for me; it was a bit of a revelation. Genesis and Genesis 2 rely on the more extensive TriAx weight maps to deform joints, whereas Genesis 3 relies heavily on JCMs, as general weight maps don’t offer anywhere near the amount of control provided by TriAx.
Skimpy Victoria Clothes Are Easier
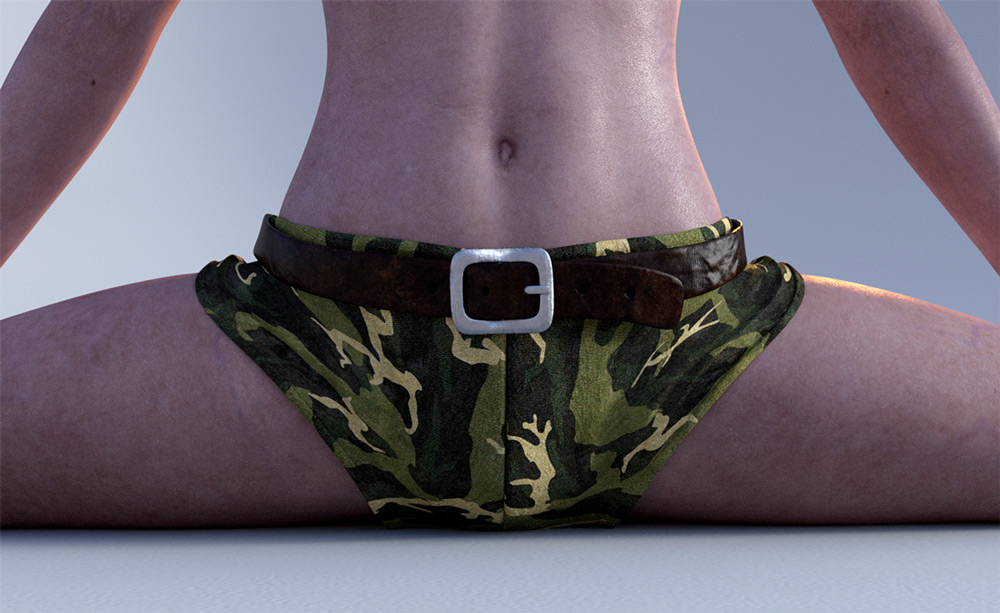
To start with, the shorts that come with the Kallisto set are a huge pain to work with when it comes to weight mapping. Although they are quite short, they hang a good distance from the crotch, and the thigh gap is very close. This causes issues when transferring the weight maps from our figure to the item, and requires both extensive re-weight mapping and JCMs to deform realistically.
If you want to save yourself some headaches, create items that are form fitting. This is just one of the reasons why so much content in DAZ’s stores is form-hugging.
Preparing for Morphing: Filling in Some Blanks
Step 1: Fit item using Transfer Utility
This topic is covered in several tutorials, including Esha’s, so it won’t be covered here. Of course you don’t need to worry with this step if you are working with content that is already rigged.
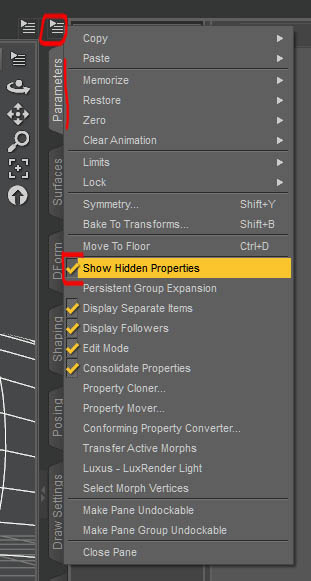
Step 2: Show hidden items
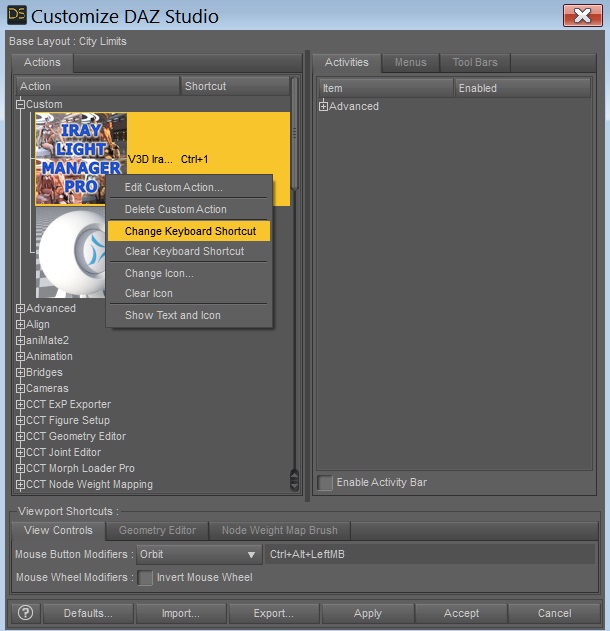
One thing that I got really stuck on during Esha’s tutorial was this fundamental key. If you can’t see JCMs then you are going to have no fun trying to replace them. (See item 1)
Item 2. Click for full
Item 1. Click for full
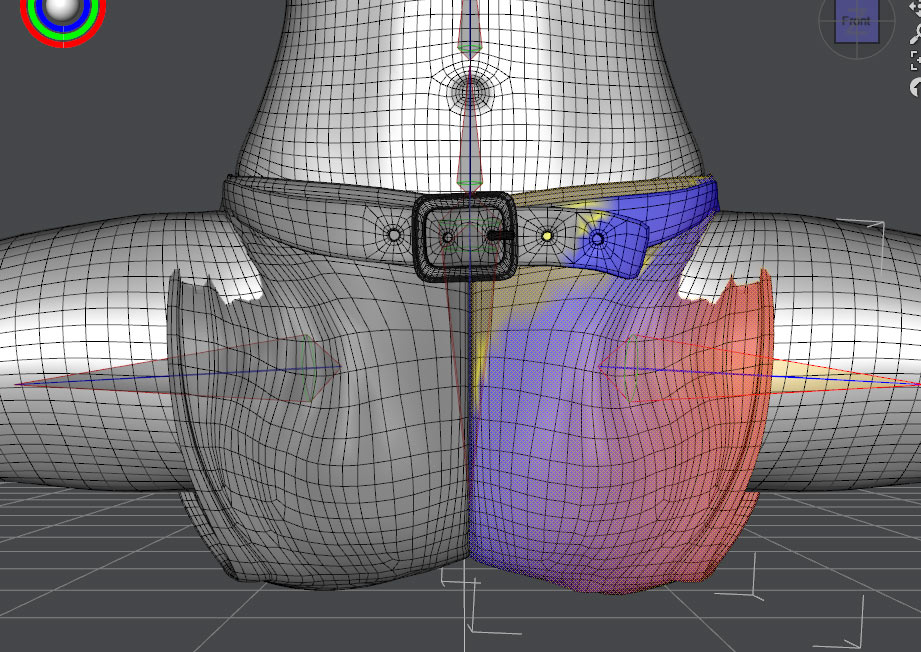
Step 3: Test weight maps and rigging
Posing Genesis shows us that there are huge problems with our rigging. Spreading the thighs to the sides, or bending them around the X axis, will generally give us some indication of how much work is needed.
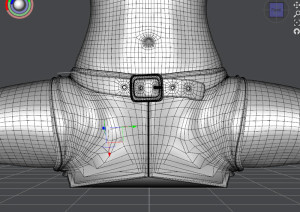
Here we can see we have significant issues! (See item 2)
The below image (item 3.) shows the JCM that is applied as Genesis 3’s thigh is posed to the side. This is the morph that we will be replacing.
Item 3. Click for full
Step 4: Smooth out the weight maps
Many issues with freshly transferred weight maps can be solved by using the weight map brush tool to smooth out problem areas.
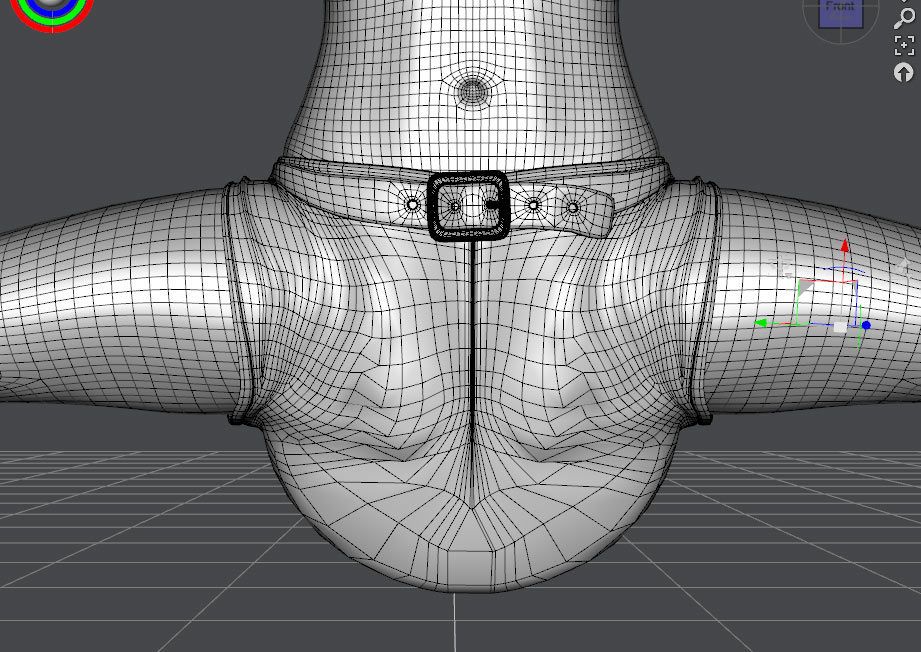
Item 4
With symmetry enabled, we are running into an issue where our left and right weight maps are cancelling each other out, thus we have a zone that has no weight maps (Item 4.). That’s why we have this huge bulge. I could simply turn off symmetry, but given the density of the mesh in this tricky area, we would end up with more mess.
To deal with this I create left and right selection zones. This way we can paint on one side and then later mirror our maps from one side to the other. Note symmetry, both with morphing and weight maps, only works with completely symmetrical meshes (another huge time saver). At this point I dial out the JCM as it is also distorting the mesh.
Item 5.
Now that we have nice smoothed-out weight maps, we really see just how tricky working with looser fitting garments can be (Item 5). As our mesh is deforming, our pants are stretching out way beyond where they should be. Remember, these are meant to be short shorts. This, however; is not our only issue.
Step 5: JCMs making a mess
Item 6.
When we turn our JCMs back on, we immediately see they are making a mess of our mesh (Item 6.). Again, with a more form-fitting garment, this would probably be less an issue. In Esha’s video, at this point, she exports the item out for creating corrective morphs. In most cases this is probably the best option, but here we can do something to try to tidy our mesh up before we export it for fixing.
Step 6: Removing vertices from morph
The idea is simple; we remove the worst effected verts from the morph. In many cases, the JCMs Genesis 3 is generating in our garments are not too much of an issue to fix, but here the JCM is creating a lot of extra work.
Step 6.1: Set JCM as favourite
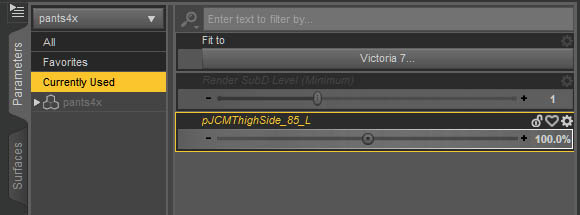
We find our JCM in the parameters tab and set it as a favourite. (Item 7.)
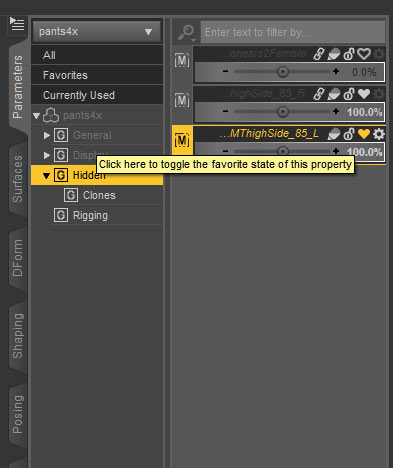
Item 7.
Step 6.2: Select the worst effected verts
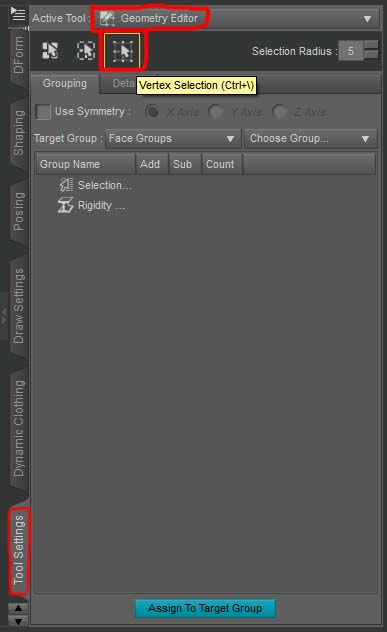
We switch to our Geometry Editor tool (Item 8.), and choose Vertex Selection. In a lot of cases like this the Marquee or Lasso Selection tool will be most useful (Item 9).
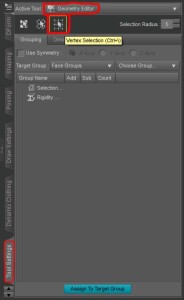
Item 8.
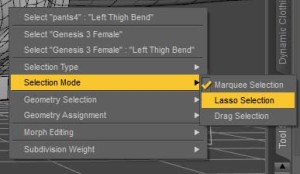
Item 9
Item 9.
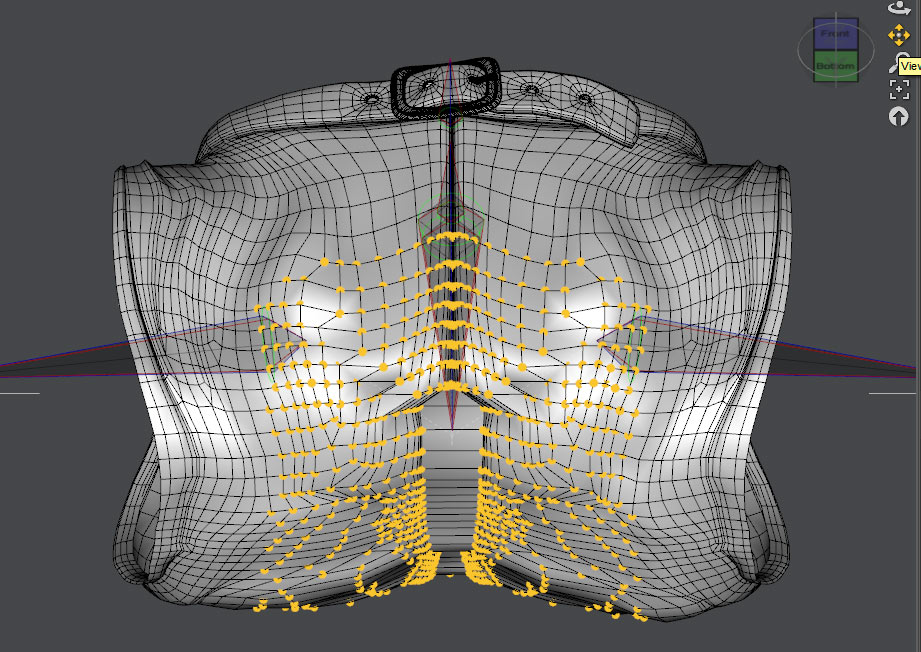
Step 6.3: Remove verts from favourites
Item 10.
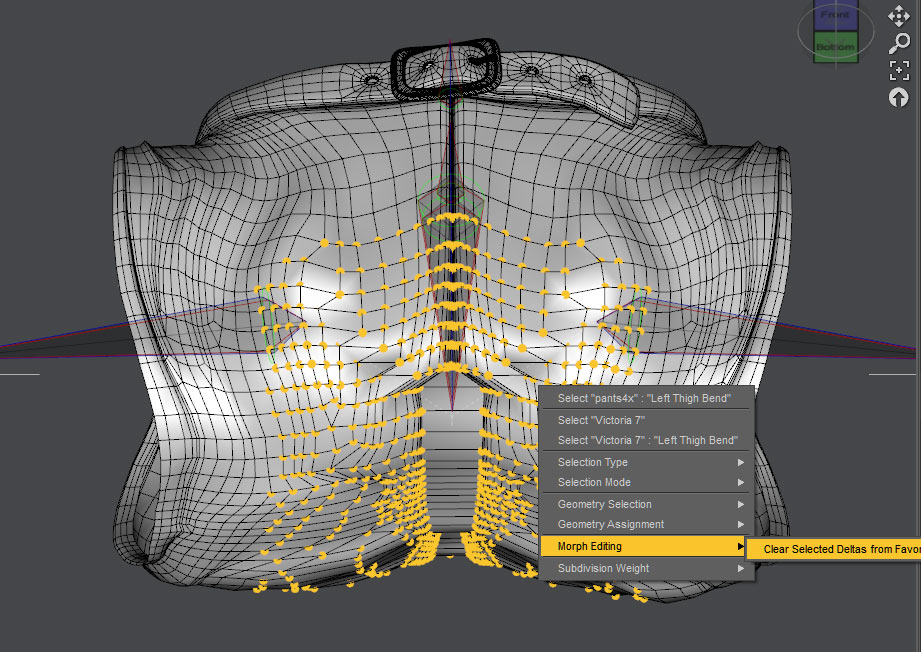
Once we have a selection that looks good we right click in our Viewport > Morph Editing > Clear Selected Deltas from Favorites (Item 10.).
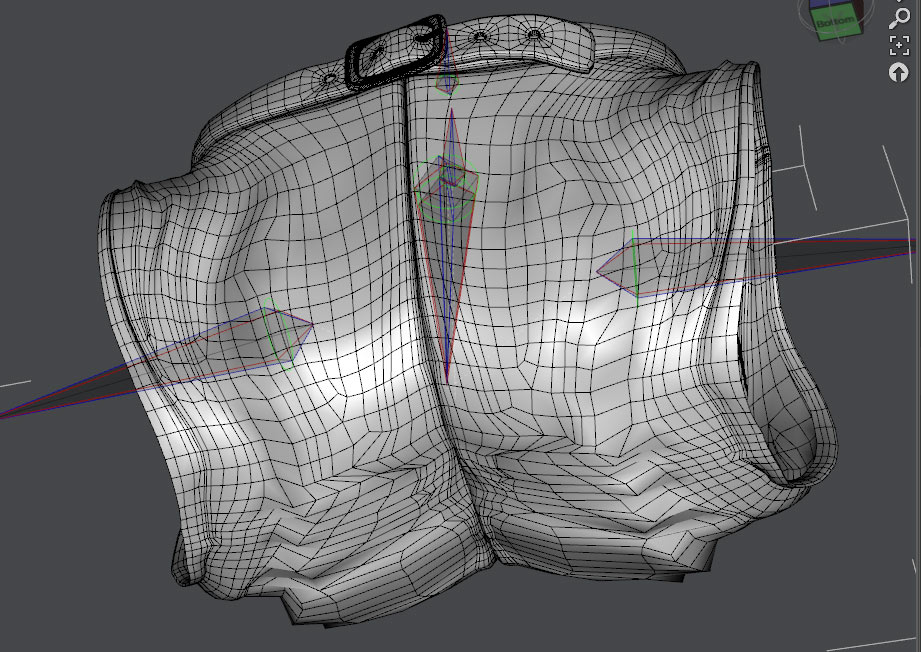
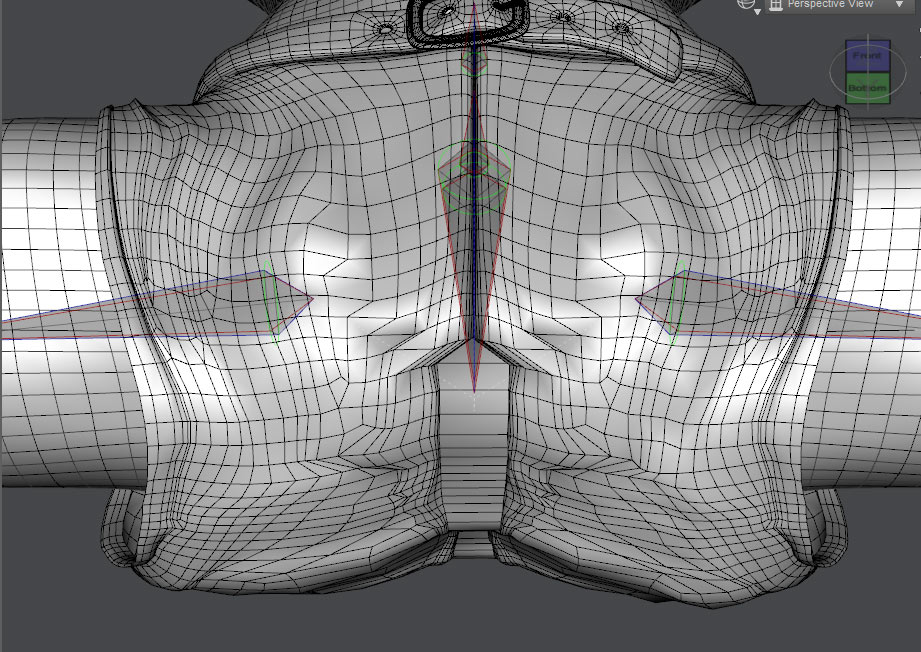
Item 11.
It isn’t perfect, but it is much, much better than what we started with. You may have to repeat those last two steps a few times to get a good result. As you can see, we now have a simpler problem to fix (Item 11.).
Step 7: Prepare for export
In all the cases so far, I have had both thighs moved up to the sides, but we need to move one leg back into its default position. We want to replace the pJCMThighSide_85_L, so having other parts of our figure posed will give us the wrong mesh from which to work.
Step 8: Export mesh from DAZ Studio
Step 8 is well covered in many tutorials.
Step 9: Create morph
Step 9 is covered by Esha, and other tutorials.
Notes on creating morphs for DAZ Studio with LightWave
Esha uses Zbrush in her demonstration, but morphs can be created in just about any 3D modelling software. LightWave is my tool of choice, however there is one caveat with using LightWave to create morphs: Do not cut all or any part of your mesh to a new layer. Doing this will wreck your vertex order, and you will end up with a morph that explodes your mesh once imported back into DAZ Studio. Instead of copying and pasting parts to a new layer, instead use the hide tool.
Note that if you imported Genesis or another template figure, on which to create your morph against (which is how I work), it is fine, and probably best, to cut and paste it to a new layer. You will not have to export your template figure back to DAZ Studio.
LightWave tools of note
Magnet was the most frequently used. Combining the magnet tool with the radial falloff option, I was able to do most of the necessary work.
Smooth was another very useful tool. Dragging around points can get a bit messy, so Smooth is great for averaging out the jags.
Hide is a tool I have rarely used up until I started making a lot of morphs. I have usually found it more convenient to simply cut and paste sections/parts of an object to new layers.
Step 10: Importing morph into DAZ Studio with morph loader pro
This is another step that is covered by Esha and others.
 Step 11: Manually hooking up JCMs
Replacing the JCM by overwriting it with another of the same name should work automatically, but I have noticed that in some cases that this is not so. DAZ’s documentation on the process is a little outdated (the interface has changed a little), but the information is transferable to the new interface.
I would like to include this information in this tutorial, but I will leave that up to a possible future tutorial. I hope this helps some of you up-and-coming content makers along the way. See you all again soon.
 I was a bit skeptical about the speculation that a new Victoria was about to drop, and well, I guess history really does repeat. Here we are with Victoria and Genesis 8, almost like clockwork, and with all the new enhancements, I’m a little buzzed. I have my copy of the Victoria 8 Pro Bundle, and I’ll be having a good play with her soon so I can put up a full review.