 Ordering Lighting Chaos In DAZ Studio
With the inclusion of Iray into DAZ Studio, managing lights became a lot more complex. With 3Delight, most of the lights settings could be configured via the properties or, alternatively, the lights tab, but now we have our lights spread over three tabs and a multitude of sub menus. We have our environment lighting, a physical sun and image based lighting maps (IBL) in our render tab; we have standard DAZ Studio lights available via the “lights” or “properties” tabs; and then we have our surface based lights accessible via the “surfaces” tab. In some cases you are going to be using all these tabs to configure lights for scenes
For some users, this is all fairly new and complicated. Users, familiar with Omnifreaker’s amazing shader and lighting tools for 3Delight, know the pain of having lighting settings spread out all over the place. It’s quite apparent that the way DAZ Studio currently organises lights is wildly inefficient. Thankfully Iray users now have Iray Light Manager Pro. This tool collects all environment, traditional lights (point, distant, spot), and surface lights into one interface.
And here enters Iray Light Manager PRO by V3Digitimes. I’m going to start with the fact that Light Manager Pro isn’t perfect, but it is worth the imperfection. It is a lot quicker than drilling down drop-down menus over several tabs. To start with I had to train myself not to go digging around in DAZ Studio’s menus (bad habits die hard), but once I got a feel for Light Manager, it became a new habit to use this. Clunky as it is, it is hands-down more efficient than clicking around the DAZ Studio interface going from tab to tab, to sub menus.
 What Does Light Manager Pro Do For Us?
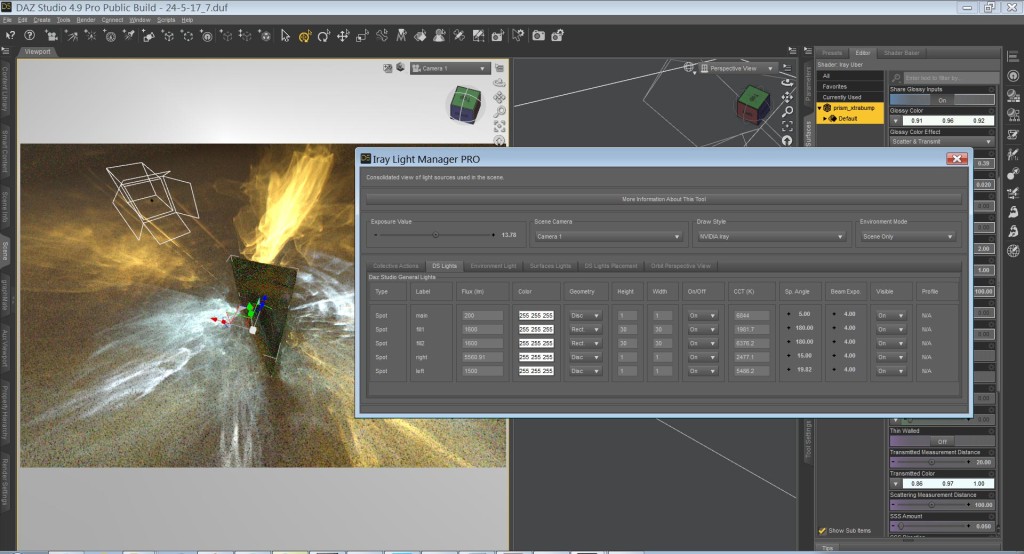
Light Manager Pro’s interface is simple and neat. It divided into six tabs, but most of the work will typically be done within three of those (DS Lights, Environment Light, and Surface lights). These tabs give near full control over our lights, and identify them clearly by type/label (DS Lights) and node/surface (Surface Lights). Controls include everything you find in the light type’s respective tabs (Surfaces, Parameters, Render > Environment), including the ability to apply IES profiles and set the geometry type for point and spot lights.
What is missing, is the ability to change light names (would be handy), and there is no option to set an environment texture. It would also be a bonus to be able to add or change textures on surface lights. These little changes will require going back to the lighting tabs. Everything else is here.
Now, the tabs that are bound to be used less. The Collective Actions tab is handy for quickly changing settings globally, such as increasing the intensity of all lights in a dark scene, or lowering them, if need be. Temperature and colour can also be changed. There is also a handy feature to exclude categories or individual lights from the edits. The other two tabs provide controls to move lights and cameras.
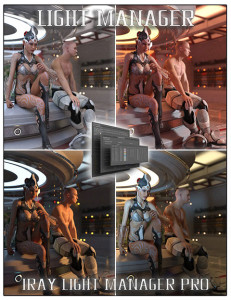
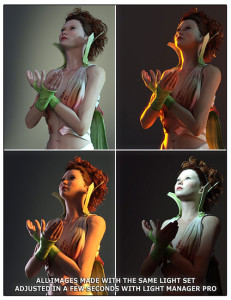
Light Manager allows for rapid configurations of many lights.
Things I Didn’t Like
In addition to the small items I mentioned above there are some real gripes. My primary complaint about Iray Light Manager Pro is that opening it makes DAZ Studio inaccessible. You cannot interact with the rest of DAZ Studio at all while Light Manager is open. This is something that really ground my goat (whatever that means) with Reality 2. There is no reason for this. I often work with two monitors and I’d be very happy to work with Light Manager open, taking up a portion of the secondary real estate. Hell, it is so handy that I’d be happy to run it taking up part of the primary display.
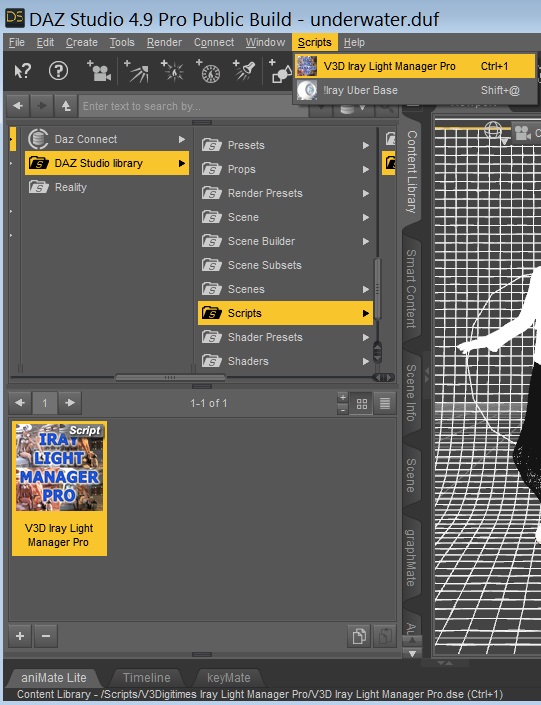
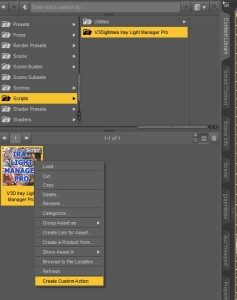
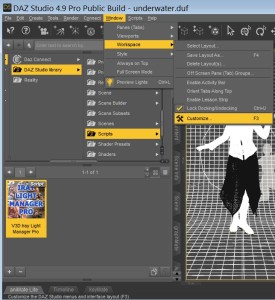
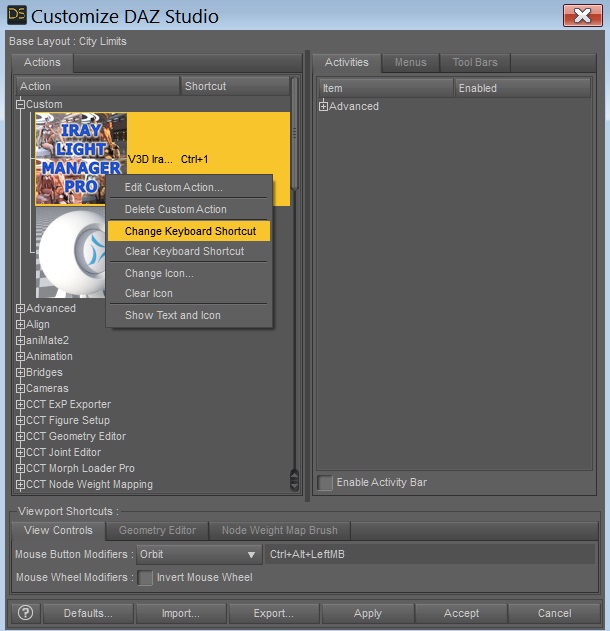
Another issue I had with the fresh install of Light Manger Pro is it comes without a menu entry or hotkey. I found it by digging around in the content library. Obviously, having to go scrolling through the content library each time would be the opposite of saving time. That would be extremely annoying. Luckily it is easy to create a “custom action” which creates a script that activates Light Manager (see our tutorial on creating custom actions and keyboard shortcuts). This is very easy to set up by right clicking the icon in the “Scripts” folder and clicking “Create Custom Action”.
Streamlined Workflow: Final Thoughts on Light Manager Pro

Putting Light Manager Pro to the test and getting out of hand.
For me, having all the lights and controls located in a single place is intuitive and far more efficient than clicking all around DAZ Studio. The limitations of the program are mostly small, though I would love to see an update to allow DAZ Studio and Iray Light Manager to both be open and usable at the same time. That one point would raise my rating from a silver to gold, even with my other minor complaints left in.
If you wish for a simpler and more efficient lighting experience with DAZ Studio, then this is the plugin for you. As the plug-ins title suggests, it is intended for Iray, but I imagine it would be handy for controlling DAZ Studio’s traditional lights with 3Delight, though most features would be superfluous.
As I was writing the original copy of this review (which I ditched), I was working on a scene to give all the features a good testing, but as with such things, I got carried away with adding more things, and now I’m in the process of texturing a parasol. However, I did find that working with Light Manager Pro prompted me to be more creative with lighting, something I assume grows out of the streamlined workflow. And how can I offer greater praise than to say a plugin promoted greater creativity.

Quick render of the item that kept me away from finishing this review earlier.