Luxus and LuxRender Beginner’s Guide For DAZ Studio Pt.2 Render Settings and the LuxRender GUI

Part 1 of the Luxus/LuxRender guide covered getting around the hidden Luxus interface, converting and setting up materals, and lights.
Don’t forget about the newly released Luxus for Carrara

Luxus for Daz Studio LuxRender hybrid render method

Luxus render settings and exporting your scene to LuxRender

Like with just about everything to do with Lux, configuring the render parameters can be a very technical business, but with Luxus the current version of  the process can be as easy as pressing render. In general the default render settings are very good (a lot better than at launch – thanks be to Spheric). They may not be the fastest settings, but they will deliver good results.

One thing that will likely catch new users unaware is that Luxus saves the exported Lux files to a temporary folder which wipes on either restarting system or on exiting Studio – don’t recall which it is now. So to avoid a situation where you’ve spent hours or days rendering an image but forget to remove the final and any other files you want to keep (such as the .lxs and .flm), and end up losing them to a restart or crash I strongly suggest moving your render location. Personally I don’t see why the plugin was configured this way to begin with. I’m a big boy – I can take out the trash.

Basic steps

luxus render settings

Don’t forget to save new scenes as new files. Overwriting your last scene can lead to serious 🙁

1. Navigate to the render settings as you usually would to render with 3Delight (standard DS render)
2. Go to the “Advanced” tab
3. Go to the “Render To” option and select the Image radio button
4. Name your scene and select the folder you want to save the image to
5. Go to “Render Engine” dropdown menu and select LuxRender via Luxus
6. For best control over your image’s exposure/render I suggest scrolling down to “tone mapping kernel and selecting linear”. This option uses controls modelled and named after those that are used by real-world cameras and will be especially familiar to those that are familiar with SLRs.

On DOF in LuxRender

Note that f-Stop settings in the Lux and its GUI are not linked to depth of field. Depth of field can be set in DS using the standard camera controls. DOF can also be set by editing the .lux scene file with a text editor. In my experience f-Stop settings in Lux need to be set to unrealistically minuscule levels. In some cases I have gone as low as setting f-stop to .1. I’ve found the most effective way to set up DOF is to set initially set f-stop to zero in the DS camera setting parameters tab, set the focal distance as desired and then manually input your f-stop value into the numerical field. See the Cameras section of the Lux Wiki for more interesting stuff.

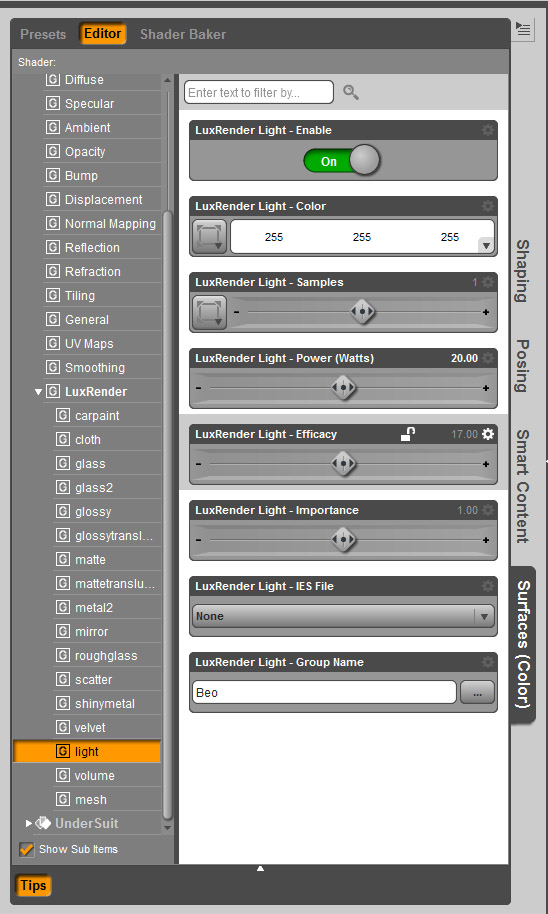
Luxus Default settings?

Just in case the default settings I have in mind aren’t so default here is what I use, and a good general setup. I’ll mention just the settings I’ve become relatively familiar with and tend to play with. Experimenting with many of the settings at random will not produce immediately noticeable results, but may slow down render times and lead to poor “final” results. Again, the Lux Wiki is your friend here.

Use LuxRender GUI (On) – trust me there is no reason to launch Lux inside DAZ Studio. Launching with Lux’s GUI will give you access to some very powerful controls and functions, such as being able to adjust light levels, camera settings (including a variety of real-world film simulations), various colour/tone adjustments, lens effects such as bloom, and the hugely useful refine brush, which lets you show Lux where to focus those samples (ie. on all that noise!).

Renderer: Sample (see below for thoughts on GPU rendering)

Sampler: Metropolis (good “intelligent” sampler for complex lighting situations)

Pixel sample: default 4 but I tend to turn it up. I’m not sure about a good general place to set this, but I came across this “…leaving it very low just turns them into a [more expensive] random sampler)” and “I wouldn’t leave it much lower than 8 or 16, you’d incur an unnecessary overhead switching between pixels if you have it too low.” In any case you should, if you so choose to do so at all, increase the pixel samples by powers of 2 eg. 2, 4, 8, 16, 32. Doing otherwise will get your number rounded to the nearest power of 2.

Pixel sampler: Vegas or Hilbert seem to be popular choices, as is linear. Vegas is apparently a little slower than the other two.

Note: after having taken a closer look at the Wiki I’m unsure if pixel sample and pixel sampler even have any effect with Metropolis as it uses its own algorithm for discovering samples to render. To be on the safe side having settings as above should not hurt your renders.

Outlier Rejection Constant: This thing is great for dealing with fireflies but comes at the expense of speed, so should be used sparingly. I noticed Spheric has this default to five (probably helps with the way it auto converts DS materials which use a lot of pure white as diffuse and specular colours), but in my experience (and under Wiki advice) setting it to 1 is general good policy. If you do have significant problems with fireflies and lots of noise in later stage renders it is worth taking a look at your material settings. High gloss and pure bright colours like absolute white are evil. For more information see this part of the Lux Wiki which specifically deals with firefly issues.

Surface Integrator: Bidirectional is the method of choice here, but path tracing can be useful for outdoor renders and simple light situations.

On GPU assisted rendering: limitations, display instability and LuxRender crashes

luxrender hybrid bidirectional render

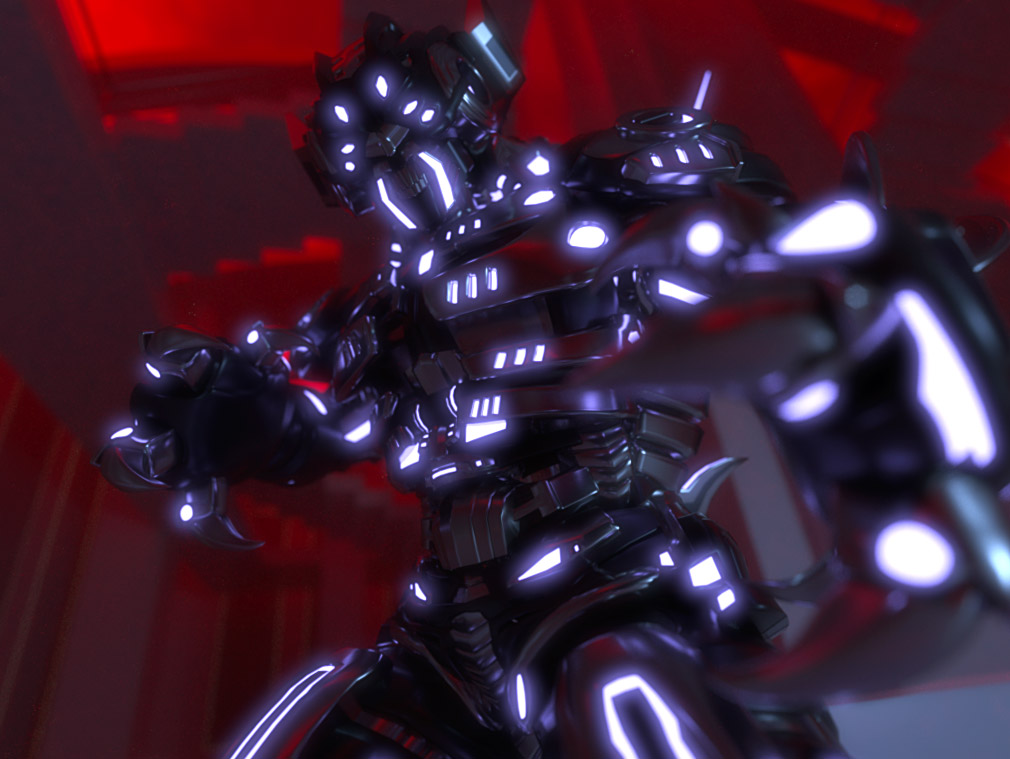
Hybrid metropolis + bidirectional render at 160s/p. Limited, but fun and fast.

The hybrid/GPU methods are currently not fully developed and, at last check, had problems with instancing (perhaps only with bidirectional). The bidirectional surface integrator (which is well suited to complex lighting situations common to interiors) is, admitted as such by the developers, only in the experimental phases when it comes to GPU assisted rendering. It will give inconsistent results and is only currently capable of utilising a single light source.

I’ve just had a short play around with the latest weekly build (17/5/2013), and bidirectional with hybrid is still temperamental, as expected. Of course being limited to one light with bidirectional still leaves a good deal of room to wiggle around in and have fun, but don’t expect the same results as you would get with CPU only. I’ve also noticed display instability while running hybrid bidir renders (flickering), and invariably Lux will crash without warning (time varies greatly and may be somewhat dependant on other PC related processes). The path traced integrator is not limited by the number of light sources, but will not produce the level of quality achievable with CPU bidir + metropolis. So, for now I will leave GPU exploration entirely up to those who wish to dabble. I have not experienced random crashes, or to my recollection flickering, while using the path traced surface integrator.

SPPM

This is something I’ve only started experimenting with, but with what I’ve seen out there from others and what I am getting myself I am quite enthusiastic. Basically it works in a cycle of passes of firing photons followed by rendering. This will continue until the user deems the image done.

The SPPM renderer method seems to be easy to configure to a basic level, though there are many elements that can be fine-tuned. Setting the pixel sampler to Hilbert, Linear or Vegas, and surface integrator to SPPM seems to produce reasonable results in a wide variety of situation and could potentially be much faster than CPU metropolis with bidirectional. Some of the settings as described in the wiki aren’t immediately apparent in Luxus and may be under different names, or might need to be set by editing the .lux file manually.

Some LuxRender GUI Basics

Exporting your image

From time-to-time you might want to grab a WIP render. The image can be found where you have designated your scene files to be saved to. You can also go to File > Export To Image > Tonemapped Low Dynamic Range Image.

Exporting images without backgrounds

You can also export images without backgrounds, assuming you didn’t add one. This is handy for those situations where only a character or part of a scene is required for compositing. Go to File > Export To Image > Output Alpha Channel. This will render you image without a background and can be found or exported as mentioned above.

Resume your render

Remember that Lux can be closed at any point during a render and can resume as desired. Go to File > Resume FLM > locate the scene .lxs when prompted > locate the related .flm

Note that if Lux crashes you’re your computer is powered down while the .flm is being written it can corrupt the file and make resume impossible (recent experience with a power outage :().

Got Noise?

If your image has been rendering a good amount of time and is mostly nice and clean except for some particularly noisy areas Lux 1.2 has a new tool to help you. The Refine Brush (accessed via tab of same name) lets the user paint areas of concern. Using the Add Importance Pen will add areas for the engine to focus samples on, and the Sub Importance Pen will remove them. Note that you can adjust the level of the pen so as to make multiple levels of importance. I assume that greater strength denotes greater importance.

Wrap up

There is a lot more I could write about the Lux GUI, but many of tools and settings are somewhat self-explanatory or, as in many cases with the colour-tuning tools (colour space tab under Imaging), I simply don’t have a thorough understanding of what they do (other than adjust tones and hues). You can play around with these settings without worry. There is always the “Reset” button that will return the GUI to its factory settings.

The lighting tab will be invaluable to most users. With most of us having little experience with unbiased render engines being able to change light levels and tone in mid render is not only useful, but fun! Changing film types in the Film Response tab will undoubtedly attract some of your interest as will the nice glowy bloom and glare features in the Lens Effects tab.

Get something cool? You can also save your panel settings from the File menu so you won’t have to start from scratch when you hit reset, or restart your render with fresh tweaks from DS.

Play, experiment! You can’t do any harm.

I hope this guide has shed some light on Luxus and the working of LuxRender for you new users, and maybe even provided some new info for longer term users that haven’t spent too much time buried in the Wiki. If you have any comments, criticisms, etc or resources that might help us, please don’t hesitate to leave a comment or contact me directly from the About page.

Luxus Pro Training

Luxus Pro Training

Wine Me

Wine Me – prop set with Luxus materials – hopefully just one of many to come

Luxus and LuxRender Beginner’s Guide For DAZ Studio Pt.1 Lights and Materials


Join Now!


Cyborg rendered with Luxrender via Luxus for Daz Studio using SPPM method.

Beo Ripper from DAZ 3D store. Rendered to around 5000 passes with LuxRenders SPPM method

Tutorial: Getting started with Luxus and Luxrender

Hi there and welcome to my short Luxus/LuxRender for DAZ Studio beginners guide. This was originally intended as a very short article, but as with such undertakings the more one writes the more it becomes clear one needs to write more. So, in the interests of ease of reading and navigating I’ve decided to split the post in to two parts. One on materials and lighting and the other (much shorter) on rendering. As there is still much about LuxRender I don’t know, I consider both parts to be ongoing works in progress. I will add more information and any corrections as they arise.

I won’t be able to answer all your questions here, but I’ll do my best to get you started. I will say upfront that I am not a LuxRender guru, but I have been tinkering with it and poking around the Wiki and forums for some time now. Lux is undoubtedly a complex beast, and right now it might still have a good deal of development ahead before it is as fast, polished and feature complete as we would like, but it is a powerful engine that is unlike anything most DAZ Studio user’s will have experienced before.

…but I’m starting to get ahead here. Let me begin right at the start for those that have little or no idea of what Luxus and LuxRender are.

Luxus and LuxRender: unbiased rendering for all

What is Luxus? Luxus is a plugin for DAZ Studio (DS) that allows scenes arranged in in DS to easily be configured and exported to LuxRender.

So, what is LuxRender? The website’s overview describes it better than I can:

“LuxRender is a physically based and unbiased rendering engine. Based on state of the art algorithms, LuxRender simulates the flow of light according to physical equations, thus producing realistic images of photographic quality.”

What this means is that, unlike biased render engines like 3Delight and Firefly, light bounces around scenes in a physically accurate manner giving realistic results. Of course, this does not automatically guarantee good results. Positioning and configuring lights, materials and cameras is still just as important in an unbiased environment as they are with biased render engines. Materials are actually a central element of the Luxus/LuxRender experience. While many DAZ Studio ready products come with materials ready to render with 3Delight, very few come with materials that are Lux native. Luxus does its best convert default DS materials, and can give reasonable results, but to me using Lux to render converted DAZ mats is missing the point. To fully access the power of LuxRender one needs to delve deeper into material configuration, thankfully Luxus provides some very good materials from which we can begin our explorations.

…but achieving good renders, lighting, materials etc. is beyond the scope of this guide, and as some might say, beyond me in general (see what I did there?). The purpose of this guide is to help familiarise you with Luxus and to an extent, LuxRender. Luxus is a brilliant and relatively inexpensive plugin. I would argue that it is a lot more flexible in terms of interfacing with Lux and is better integrated with DS than its older cousin, Reality/2/3, which is undoubtedly still a very good plugin and has many great features that Luxus may never have. Reality is the premium product in terms of features, but for speed, flexibility, and price you can’t go past Luxus.

Where Luxus falls down, at least in the beginning, is that its key controls are hidden within DS’s interface, and the manual, as many have already discovered, is very light on details. The primary purpose of this guide is to illuminate the hidden workings of Luxus (did I just do a pun?).

Setting up LuxRender materials with Luxus

Quick note on the surface selection tool for new DS users. This tool is an invaluable time saver when creating scenes either for render with 3Delight or LuxRender. Browsing through the desired “surfaces” tab and drop down menus for just one of dozens or hundreds of surfaces can be a tedious job. The surface selector (press Alt, Shift, M) will let you quickly select the exact surface you want to edit and open it in the surfaces tab – quick and painless!

luxus material setup 1

Luxus’ material configuration tools are hidden within DS’s interface. (click for full image)

1. Select the surface the you want to edit first.
2. Click the “options” button (usually inside top of the taskbar you are working with – see above), and scroll down to and click “Luxus – LuxRender Materials”.
3. Select your material option of choice. I recommend you start with something easy like one of the metal or glass presets.

luxus material popup

The Luxus material popup contains a selection of LuxRender material bases.

4. You can access your new material and options from the “surfaces tab”, which should already be opened to the surface you are working with. Click the triangle expand menu icon and scroll down to “LuxRender” and expand again.
5. You can now tweak/outrageously experiment with your new materials.

Note that if you can convert multiple surfaces to the same type of Lux material at the same time if you have them selected when you apply the desired settings. To select multiple surfaces at a time, hold CTRL and click the desired surfaces either with the surface selection tool, or from the surfaces tab. This works very well for things like character skins where you will want to have uniform materials over several different surfaces.

More on materials

Many of these materials are quite specific in nature. This is great for getting good results fast. The metal and glass materials look fantastic and have some scope for tweaking to get the kind of metal or glass you want. Creating skin materials is much harder, but the matte translucent and glossy translucent materials are a great place to start. Selecting the “Volume Parameters” from the “Luxus – LuxRender materials” popup will open up more options for creating subsurface scattering effects. At this time the homogenous “LuxRender Volume Type” is the only real option for realistic skin. This can be selected from your surfaces menu under LuxRender > Volume.

Of course rendering this as is will likely produce results that are not at all to your needs. Creating good human skin is beyond the scope of this “basics” guide, and something I have only done a little experimentation with. Getting the best possible results requires a through reading and understanding of the materials section of the LuxRender Wiki. The Wiki is an invaluable source of information on how the rather complex render engine works, and really is a must for anyone that wants to go below the surface (yet more accidental puns. I’m on fia!).

UberSurface skin conversions and using DAZ surface settings to create and adjust LuxRender materials via “Copy Studio Parameters”

Luxus for daz studio ubersurface skin conversion

Raw Lux render of “Basic Genesis Female” with materials converted to LuxRender using Spheric Labs’ presets with minor tweaks.

In my naivety I didn’t even give Luxus’ conversion of UberSurface based character shader sets a chance, but Spheric Labs deserves a good deal of credit for setting up a very serviceable translation. The conversion will have varied results with different skin configurations as UberSurface rigs come in a huge variety. I found the current version of Genesis Basic Female/Male worked quite well but was a little on the matte side. In this case getting a more significant specular response involves adjusting the regular DAZ Studio materials for a combination of increased gloss, specular, reflection and perhaps tweaking their related colour values. I found this process confusing and found getting predictable results easier using and reconfiguring the provided LuxRender material presets.

luxus auto conversion sss

Here’s what the Luxus manual has to say on converting DAZ Studio materials, particularly UberSurface character presets to Lux materials:

“Luxus will automatically translate existing materials to LuxRender materials.The materials that exist in Studio are setup to look a certain way in 3Delight. Some of these materials are custom shaders whose implementation is know only to their respective authors. The names of the parameters are utilized by Luxus to do the translation. Depending on options, UberSurface and its derivatives are translated to a glossy translucent material with subsurface scattering and usually achieves excellent results.”

For Lux users deadset against learning about LuxRender materials the Luxus conversions and ability to tweak by using the regular DS surface editor controls, this method is a huge plus, and given practice and a good deal of trial and error could be used to produce some very good Lux materials.

Turning surfaces into lights

luxus surface lights

Setting surfaces as lights (click for full image)

1. With your material of choice selected navigate to the Luxus material selector popup (as described in steps 1&2 above).
2. Check the Light Parameters box and “Accept”.
3. You will now need to open the surface materials in the “Surfaces” tab (also described above) and navigate to the lights section of the LuxRender submenu.
4. At the top of the window will be a box titled LuxRender Light- Enable. Toggle the option to on.

The above method can be used to turn planes into mesh (area) lights. For these you will need to create a plane primitive and place as desired. The “normal” must face the light’s target. The plane’s normal runs in the same direction the green translation indicator/handle, so point that green arrow at whatever you want to light. Follow steps as above (Turning surfaces into lights)

You will also notice that IES light profiles/maps can also be added to mesh lights. IES profiles, for those not in-the-know are files that contain light distribution data from real-world light sources such as globes, fluorescent tubes, flood lights etc. These, when applied to our lights in 3D spaces result in light sources that are much more realistic than the way the typical render engine defines these sorts of light sources. For more detail on IES files see this post/tube video. For a nice selection of IES files check out this little post by Derek Jenson, who offers us his handpicked favourites.

If you would like to see the lights before you import them into Lux you can use an IES viewer. This one is my favourite, and the favourite of many others – strangely enough it is called IESviewer.

Setting up LuxRender lights with Luxus

For this section of the tutorial I will demonstrate setting up an IBL source as it will give you a good rounded understanding of setting up other Lux lights in DS.

luxus light settings1

Select Luxus – LuxRender Light menu item to bring up the light selection popup.

1. Place a standard DAZ Studio distant light (any would do really), as you would normally
2. Select the “parameters” tab from your sidebar or wherever you typically select it from
3. Select the light you just created
4. Click the  “options” button (usually inside top of the taskbar you are working with) and scroll to and select “Luxus – LuxRender Light”

5. In your lights “Parameters” menu expand the “LuxRender Light” sub menu
6. Select “infinite”
7. Go to “LuxRender Infinite Light – Environment Map”
8. Locate the folder where you keep your HDR images and select your choice
9. Go to “LuxRender Infinite Light – Mapping” and make sure you have the correct map setting applied (Spherical appears to be the most common).If you’re not sure which is which see the Environment Map article on the Lux Wiki
10.Group/name your lights (done in parameters tab for all lights except mesh – done in surfaces). With the current version of Luxus I believe lights are automatically placed in separate groups, meaning they can be altered individually on the fly in Lux. Giving your lights a unique name as to their function or location can be very helpful to make tweaking them mid render quicker and easier.
11. You can also group any of your lights together by giving them the same name. Apparently this can speed up your renders, but you lose the ability to alter them individually during render. According to SphericLabs (developer) in a post in the Luxus thread on the DAZ 3D forums the performance boost by grouping lights is negligible. This could well be the case, but when CPU only render methods can take days for complex scenes the benefit might start to accumulate.

Other light types you may not be familiar with

Generally I would suggest using the standard DS distant or spot light bases to be your Lux light placeholders. Using these will give you an accurate indication of where your Lux lights will be pointing/placed.

Goniometric: another light that can use IES light profiles.

Sky/Sun: Will convert your Standard DS lights into light sources that mimic skies and suns (strangely enough).

Projection: Again, does as the name implies – will turn your lights into image projectors.

Luxus for Carrara

DAZ Studio 4 - Create 3D Art for Free

Eliane CK showing off the power of LuxRender and Luxus with one of her unmistakeable signature images

If you happen to be a Carrara user and haven’t yet discovered, for some strange reason, Luxus for Carrara was recently released. As the plugin is quite different from the DS counterpart, much of what is contained in part 1 of the guide will not be applicable. Part 2 is more general to LuxRender and therfore will contain a lot more information useful to Luxus for Carrara users, especially those new to LuxRender.

 Conclude Pt. 1

This concludes Pt. 1 of the guide. Most of the work for the second part has allready been completed and will be posted soon. It will cover Exporting your scene to LuxRender, render settings and methods, and the features and functions of Lux’s compact but powerful GUI. So, if you still haven’t picked up a copy of Luxus, grab it now. Like I said at the beginning of the article, I am treating this guide as a work in progress, so I intend to update and improve it in time. To that end, please feel free to leave any comments, questions, resource links, and possible corrections in the comments section below. You can also contact me directly via the contact form at the bottom of the About page.

Pt. 2 of guide