Review: Iray Light Manager Pro (for Daz Studio)

413243Ordering Lighting Chaos In DAZ Studio

With the inclusion of Iray into DAZ Studio, managing lights became a lot more complex. With 3Delight, most of the lights settings could be configured via the properties or, alternatively, the lights tab, but now we have our lights spread over three tabs and a multitude of sub menus. We have our environment lighting, a physical sun and image based lighting maps (IBL) in our render tab; we have standard DAZ Studio lights available via the “lights” or “properties” tabs; and then we have our surface based lights accessible via the “surfaces” tab. In some cases you are going to be using all these tabs to configure lights for scenes

For some users, this is all fairly new and complicated. Users, familiar with Omnifreaker’s amazing shader and lighting tools for 3Delight, know the pain of having lighting settings spread out all over the place. It’s quite apparent that the way DAZ Studio currently organises lights is wildly inefficient. Thankfully Iray users now have Iray Light Manager Pro. This tool collects all environment, traditional lights (point, distant, spot), and surface lights into one interface.

And here enters Iray Light Manager PRO by V3Digitimes. I’m going to start with the fact that Light Manager Pro isn’t perfect, but it is worth the imperfection. It is a lot quicker than drilling down drop-down menus over several tabs. To start with I had to train myself not to go digging around in DAZ Studio’s menus (bad habits die hard), but once I got a feel for Light Manager, it became a new habit to use this. Clunky as it is, it is hands-down more efficient than clicking around the DAZ Studio interface going from tab to tab, to sub menus.
54233What Does Light Manager Pro Do For Us?

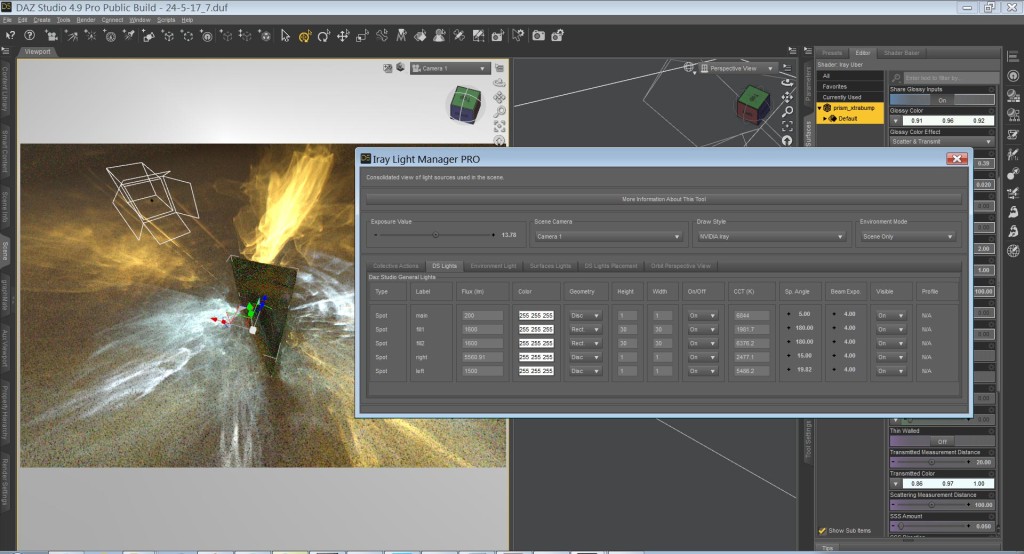
Light Manager Pro’s interface is simple and neat. It divided into six tabs, but most of the work will typically be done within three of those (DS Lights, Environment Light, and Surface lights). These tabs give near full control over our lights, and identify them clearly by type/label (DS Lights) and node/surface (Surface Lights). Controls include everything you find in the light type’s respective tabs (Surfaces, Parameters, Render > Environment), including the ability to apply IES profiles and set the geometry type for point and spot lights.

What is missing, is the ability to change light names (would be handy), and there is no option to set an environment texture. It would also be a bonus to be able to add or change textures on surface lights. These little changes will require going back to the lighting tabs. Everything else is here.

Now, the tabs that are bound to be used less. The Collective Actions tab is handy for quickly changing settings globally, such as increasing the intensity of all lights in a dark scene, or lowering them, if need be. Temperature and colour can also be changed.  There is also a handy feature to exclude categories or individual lights from the edits. The other two tabs provide controls to move lights and cameras.

Iray Light Manager Pro for Daz Studio in action.

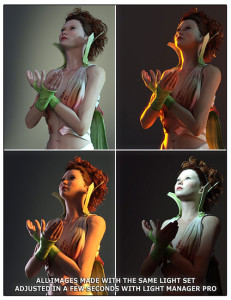
Light Manager allows for rapid configurations of many lights.

Things I Didn’t Like

In addition to the small items I mentioned above there are some real gripes. My primary complaint about Iray Light Manager Pro is that opening it makes DAZ Studio inaccessible. You cannot interact with the rest of DAZ Studio at all while Light Manager is open. This is something that really ground my goat (whatever that means) with Reality 2. There is no reason for this. I often work with two monitors and I’d be very happy to work with Light Manager open, taking up a portion of the secondary real estate. Hell, it is so handy that I’d be happy to run it taking up part of the primary display.

Another issue I had with the fresh install of Light Manger Pro is it comes without a menu entry or hotkey. I found it by digging around in the content library. Obviously, having to go scrolling through the content library each time would be the opposite of saving time. That would be extremely annoying. Luckily it is easy to create a “custom action” which creates a script that activates Light Manager (see our tutorial on creating custom actions and keyboard shortcuts). This is very easy to set up by right clicking the icon in the “Scripts” folder and clicking “Create Custom Action”.

Streamlined Workflow: Final Thoughts on Light Manager Pro

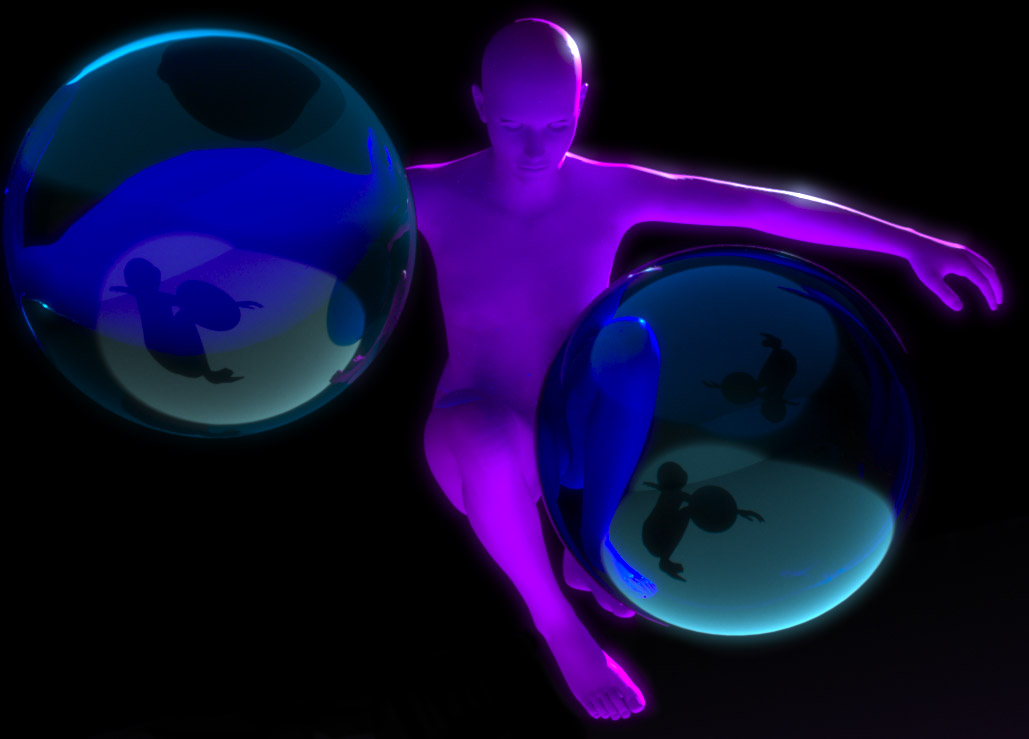
Stalker: DAZ Studio Iray render. Ominous back-lit figure menaces in background as woman poses under soft lights.

Putting Light Manager Pro to the test and getting out of hand.

For me, having all the lights and controls located in a single place is intuitive and far more efficient than clicking all around DAZ Studio. The limitations of the program are mostly small, though I would love to see an update to allow DAZ Studio and Iray Light Manager to both be open and usable at the same time. That one point would raise my rating from a silver to gold, even with my other minor complaints left in.

If you wish for a simpler and more efficient lighting experience with DAZ Studio, then this is the plugin for you. As the plug-ins title suggests, it is intended for Iray, but I imagine it would be handy for controlling DAZ Studio’s traditional lights with 3Delight, though most features would be superfluous.

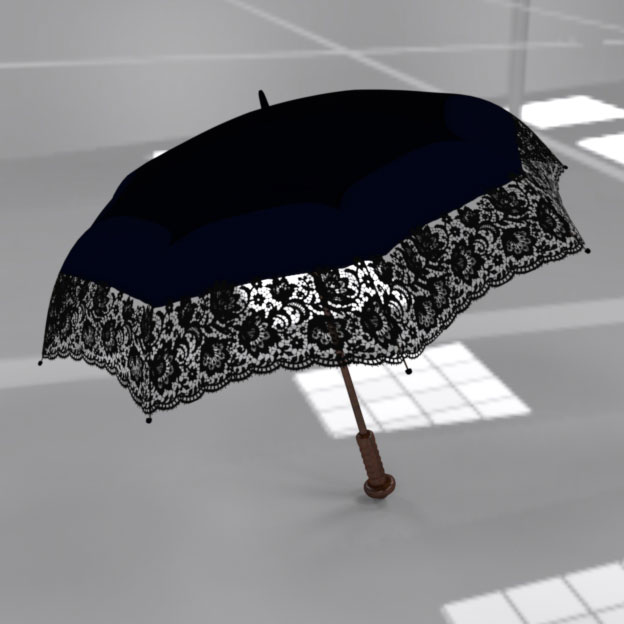
As I was writing the original copy of this review (which I ditched), I was working on a scene to give all the features a good testing, but as with such things, I got carried away with adding more things, and now I’m in the process of texturing a parasol. However, I did find that working with Light Manager Pro prompted me to be more creative with lighting, something I assume grows out of the streamlined workflow. And how can I offer greater praise than to say a plugin promoted greater creativity.

Parasol 3D model work in progress. Rendered in DAZ Studio.

Quick render of the item that kept me away from finishing this review earlier.


Luxus and LuxRender Beginner’s Guide For DAZ Studio Pt.2 Render Settings and the LuxRender GUI

Part 1 of the Luxus/LuxRender guide covered getting around the hidden Luxus interface, converting and setting up materals, and lights.
Don’t forget about the newly released Luxus for Carrara

Luxus for Daz Studio LuxRender hybrid render method

Luxus render settings and exporting your scene to LuxRender

Like with just about everything to do with Lux, configuring the render parameters can be a very technical business, but with Luxus the current version of  the process can be as easy as pressing render. In general the default render settings are very good (a lot better than at launch – thanks be to Spheric). They may not be the fastest settings, but they will deliver good results.

One thing that will likely catch new users unaware is that Luxus saves the exported Lux files to a temporary folder which wipes on either restarting system or on exiting Studio – don’t recall which it is now. So to avoid a situation where you’ve spent hours or days rendering an image but forget to remove the final and any other files you want to keep (such as the .lxs and .flm), and end up losing them to a restart or crash I strongly suggest moving your render location. Personally I don’t see why the plugin was configured this way to begin with. I’m a big boy – I can take out the trash.

Basic steps

luxus render settings

Don’t forget to save new scenes as new files. Overwriting your last scene can lead to serious 🙁

1. Navigate to the render settings as you usually would to render with 3Delight (standard DS render)
2. Go to the “Advanced” tab
3. Go to the “Render To” option and select the Image radio button
4. Name your scene and select the folder you want to save the image to
5. Go to “Render Engine” dropdown menu and select LuxRender via Luxus
6. For best control over your image’s exposure/render I suggest scrolling down to “tone mapping kernel and selecting linear”. This option uses controls modelled and named after those that are used by real-world cameras and will be especially familiar to those that are familiar with SLRs.

On DOF in LuxRender

Note that f-Stop settings in the Lux and its GUI are not linked to depth of field. Depth of field can be set in DS using the standard camera controls. DOF can also be set by editing the .lux scene file with a text editor. In my experience f-Stop settings in Lux need to be set to unrealistically minuscule levels. In some cases I have gone as low as setting f-stop to .1. I’ve found the most effective way to set up DOF is to set initially set f-stop to zero in the DS camera setting parameters tab, set the focal distance as desired and then manually input your f-stop value into the numerical field. See the Cameras section of the Lux Wiki for more interesting stuff.

Luxus Default settings?

Just in case the default settings I have in mind aren’t so default here is what I use, and a good general setup. I’ll mention just the settings I’ve become relatively familiar with and tend to play with. Experimenting with many of the settings at random will not produce immediately noticeable results, but may slow down render times and lead to poor “final” results. Again, the Lux Wiki is your friend here.

Use LuxRender GUI (On) – trust me there is no reason to launch Lux inside DAZ Studio. Launching with Lux’s GUI will give you access to some very powerful controls and functions, such as being able to adjust light levels, camera settings (including a variety of real-world film simulations), various colour/tone adjustments, lens effects such as bloom, and the hugely useful refine brush, which lets you show Lux where to focus those samples (ie. on all that noise!).

Renderer: Sample (see below for thoughts on GPU rendering)

Sampler: Metropolis (good “intelligent” sampler for complex lighting situations)

Pixel sample: default 4 but I tend to turn it up. I’m not sure about a good general place to set this, but I came across this “…leaving it very low just turns them into a [more expensive] random sampler)” and “I wouldn’t leave it much lower than 8 or 16, you’d incur an unnecessary overhead switching between pixels if you have it too low.” In any case you should, if you so choose to do so at all, increase the pixel samples by powers of 2 eg. 2, 4, 8, 16, 32. Doing otherwise will get your number rounded to the nearest power of 2.

Pixel sampler: Vegas or Hilbert seem to be popular choices, as is linear. Vegas is apparently a little slower than the other two.

Note: after having taken a closer look at the Wiki I’m unsure if pixel sample and pixel sampler even have any effect with Metropolis as it uses its own algorithm for discovering samples to render. To be on the safe side having settings as above should not hurt your renders.

Outlier Rejection Constant: This thing is great for dealing with fireflies but comes at the expense of speed, so should be used sparingly. I noticed Spheric has this default to five (probably helps with the way it auto converts DS materials which use a lot of pure white as diffuse and specular colours), but in my experience (and under Wiki advice) setting it to 1 is general good policy. If you do have significant problems with fireflies and lots of noise in later stage renders it is worth taking a look at your material settings. High gloss and pure bright colours like absolute white are evil. For more information see this part of the Lux Wiki which specifically deals with firefly issues.

Surface Integrator: Bidirectional is the method of choice here, but path tracing can be useful for outdoor renders and simple light situations.

On GPU assisted rendering: limitations, display instability and LuxRender crashes

luxrender hybrid bidirectional render

Hybrid metropolis + bidirectional render at 160s/p. Limited, but fun and fast.

The hybrid/GPU methods are currently not fully developed and, at last check, had problems with instancing (perhaps only with bidirectional). The bidirectional surface integrator (which is well suited to complex lighting situations common to interiors) is, admitted as such by the developers, only in the experimental phases when it comes to GPU assisted rendering. It will give inconsistent results and is only currently capable of utilising a single light source.

I’ve just had a short play around with the latest weekly build (17/5/2013), and bidirectional with hybrid is still temperamental, as expected. Of course being limited to one light with bidirectional still leaves a good deal of room to wiggle around in and have fun, but don’t expect the same results as you would get with CPU only. I’ve also noticed display instability while running hybrid bidir renders (flickering), and invariably Lux will crash without warning (time varies greatly and may be somewhat dependant on other PC related processes). The path traced integrator is not limited by the number of light sources, but will not produce the level of quality achievable with CPU bidir + metropolis. So, for now I will leave GPU exploration entirely up to those who wish to dabble. I have not experienced random crashes, or to my recollection flickering, while using the path traced surface integrator.

SPPM

This is something I’ve only started experimenting with, but with what I’ve seen out there from others and what I am getting myself I am quite enthusiastic. Basically it works in a cycle of passes of firing photons followed by rendering. This will continue until the user deems the image done.

The SPPM renderer method seems to be easy to configure to a basic level, though there are many elements that can be fine-tuned. Setting the pixel sampler to Hilbert, Linear or Vegas, and surface integrator to SPPM seems to produce reasonable results in a wide variety of situation and could potentially be much faster than CPU metropolis with bidirectional. Some of the settings as described in the wiki aren’t immediately apparent in Luxus and may be under different names, or might need to be set by editing the .lux file manually.

Some LuxRender GUI Basics

Exporting your image

From time-to-time you might want to grab a WIP render. The image can be found where you have designated your scene files to be saved to. You can also go to File > Export To Image > Tonemapped Low Dynamic Range Image.

Exporting images without backgrounds

You can also export images without backgrounds, assuming you didn’t add one. This is handy for those situations where only a character or part of a scene is required for compositing. Go to File > Export To Image > Output Alpha Channel. This will render you image without a background and can be found or exported as mentioned above.

Resume your render

Remember that Lux can be closed at any point during a render and can resume as desired. Go to File > Resume FLM > locate the scene .lxs when prompted > locate the related .flm

Note that if Lux crashes you’re your computer is powered down while the .flm is being written it can corrupt the file and make resume impossible (recent experience with a power outage :().

Got Noise?

If your image has been rendering a good amount of time and is mostly nice and clean except for some particularly noisy areas Lux 1.2 has a new tool to help you. The Refine Brush (accessed via tab of same name) lets the user paint areas of concern. Using the Add Importance Pen will add areas for the engine to focus samples on, and the Sub Importance Pen will remove them. Note that you can adjust the level of the pen so as to make multiple levels of importance. I assume that greater strength denotes greater importance.

Wrap up

There is a lot more I could write about the Lux GUI, but many of tools and settings are somewhat self-explanatory or, as in many cases with the colour-tuning tools (colour space tab under Imaging), I simply don’t have a thorough understanding of what they do (other than adjust tones and hues). You can play around with these settings without worry. There is always the “Reset” button that will return the GUI to its factory settings.

The lighting tab will be invaluable to most users. With most of us having little experience with unbiased render engines being able to change light levels and tone in mid render is not only useful, but fun! Changing film types in the Film Response tab will undoubtedly attract some of your interest as will the nice glowy bloom and glare features in the Lens Effects tab.

Get something cool? You can also save your panel settings from the File menu so you won’t have to start from scratch when you hit reset, or restart your render with fresh tweaks from DS.

Play, experiment! You can’t do any harm.

I hope this guide has shed some light on Luxus and the working of LuxRender for you new users, and maybe even provided some new info for longer term users that haven’t spent too much time buried in the Wiki. If you have any comments, criticisms, etc or resources that might help us, please don’t hesitate to leave a comment or contact me directly from the About page.

Luxus Pro Training

Luxus Pro Training

Wine Me

Wine Me – prop set with Luxus materials – hopefully just one of many to come

More real-time rendering musings with Unreal Engine 4

aki ross final fantasy: spirits within movie

Aki Ross – the CG superstar that sadly never was

Do you remember Final Fantasy: Spirits Within? I sure do. As an occasional fan of the Final Fantasy games I will say that I was very excited to hear about the movie, and to an extent I wasn’t even disappointed. As the on/off fan I wasn’t distressed by the disconnection the film had with the games, and given that all the games are more-or-less unconnected why would the movie have been any different? The CGI, even now, is a stunning piece of work even if the motion capture fell a little short at times, and the movie as a whole was letdown by a plot that bordered on utter rubbish propelled along by a clichéd, and occasionally cringe-worthy band of characters. Despite all this I still love the movie for that CGI feast.

…and then there’s Aki Ross… four-hundred thousand beautifully rendered polygons that were not popping out of her outfit, cutesfied, or eroticised at every opportunity; now that is something that is indeed rare for a leading female anime character (yes I did just say FFSW was anime – deal!). But I’m getting off track.

Spirits Within still stands as one of the most expensive CGI movies ever produced. According to Wikipedia the film was rendered with a “home-made” render farm composed of 960 Pentium III-933 MHz, with each of the 141,964 frames taking an average of 90 minutes to render. If my maths is right that’s over 24 years of rendering! That was all back in 2001. Fast forward 12 years to today with technologies that are capable of rendering characters, animation, and environments in real-time in detail only wide-eyed dreamers dared to ponder on, and it creeps ever onward towards photorealism. Indeed, looking at the latest tech demos you could be forgiven for thinking we are already there.

Once again I’m finding myself very excited by the possibilities of new 3D game engines like Unreal Engine 4. Just a few days ago (29th March 2013) the Infiltrator tech demo went up on the Unreal Engine YouTube channel. Of course, Epic being Epic they had to demonstrate their fancy new technology with adrenaline fuelled pew pew action.

As far as I’m informed (Polygon) everything in the video is a real-time rendering all running on an Nvidia GTX 680, which while coming with at a considerable price, is well within reach for many. When we have the potential for such grand visual immersion coupled with the engine’s amazing editing tools I’m left with a huge thrill for the possibilities, not only for the production of big budget high octane games, but for the modding community, indie developers, animators, and artists. GPU based real-time rendering is making huge leaps and it has been pushed largely by video games. Could we be about to see the technologies and software used to develop games explode into widespread use in many different applications?

This is what can currently be done with UE3. Skip to about 1 min in to see all the neat features.

The engine has also been used to render environments for children’s show LazyTown.